- Review: HOTT Sauna – The most portable sauna tent? - February 5, 2026
- Review: Telttasaana Sauna Tent – Narvi stove is the MVP! - February 4, 2026
- The Best Sauna Tents – A Complete Guide (2026) - January 22, 2026
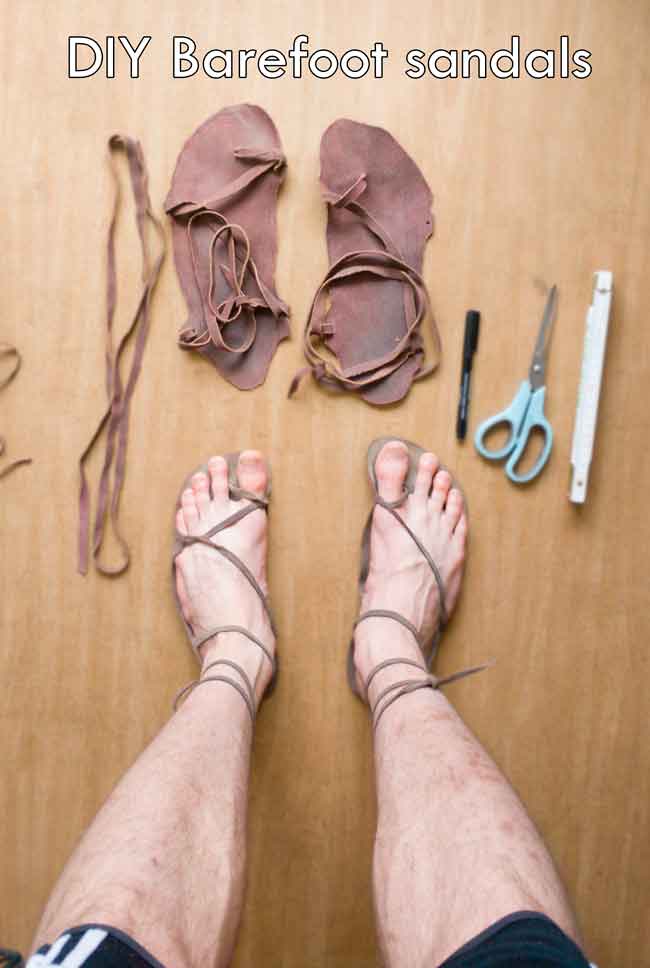
After years of wearing barefoot shoes (Vivobarefoot in particular) I really wanted to create some DIY barefoot sandals. I had been doing some hiking and walking around completely barefoot, but I figured a small layer of protection would help – and also reduce the amount of strange looks.
I went for some Tarahumara-inspired barefoot sandals made from leather and they’re incredibly comfortable and I have no problem running in them. Here’s a guide on how to make barefoot sandals 🙂
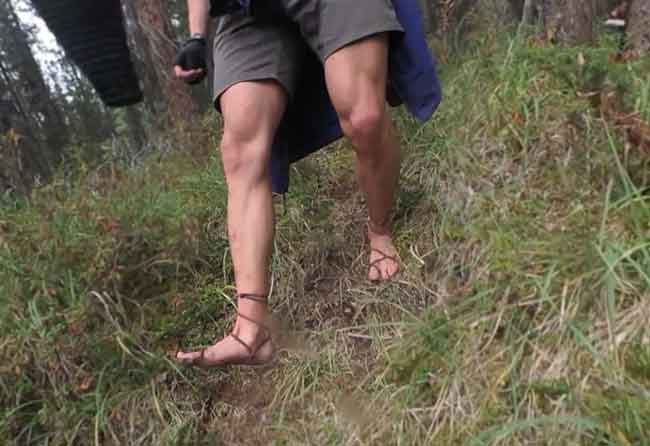

Table of Contents
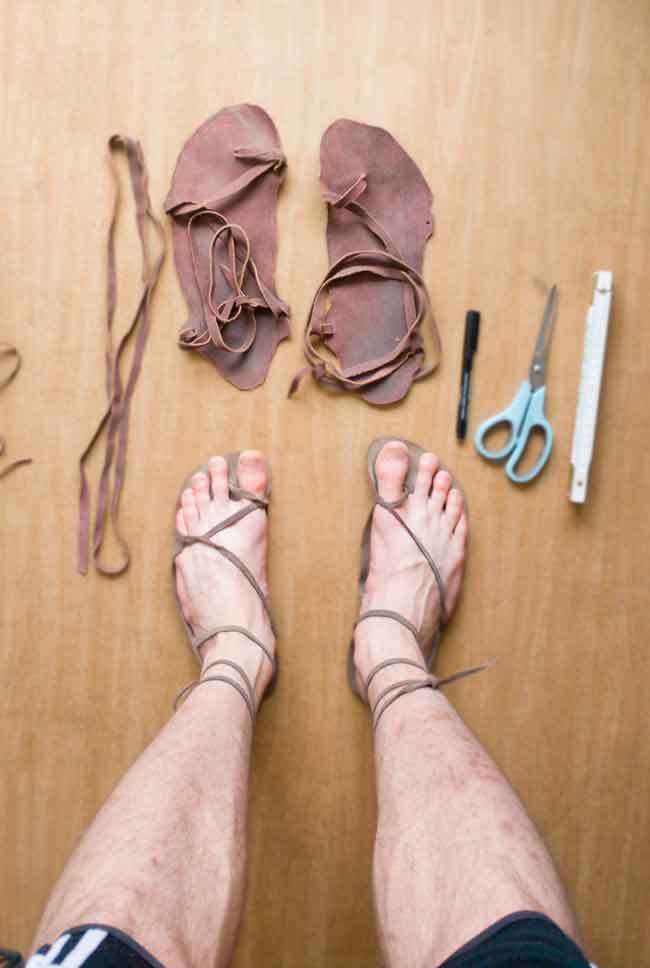
Materials need to make DIY leather sandals
Of course you can substitute any of these tools/materials for whatever you feel like. You can use paracord and a bike tire to make the sandals instead of leather.
- Leather (cow, buffalo, deer, moose, etc)
- Strong scissors/shears
- Leather punch (or pick & box cutter)
- Long straight ruler (if making laces)
- Box cutter (if making laces)
- Dye (optional)
- A beer or joint and a sunny day
Material/leather choice for barefoot sandals
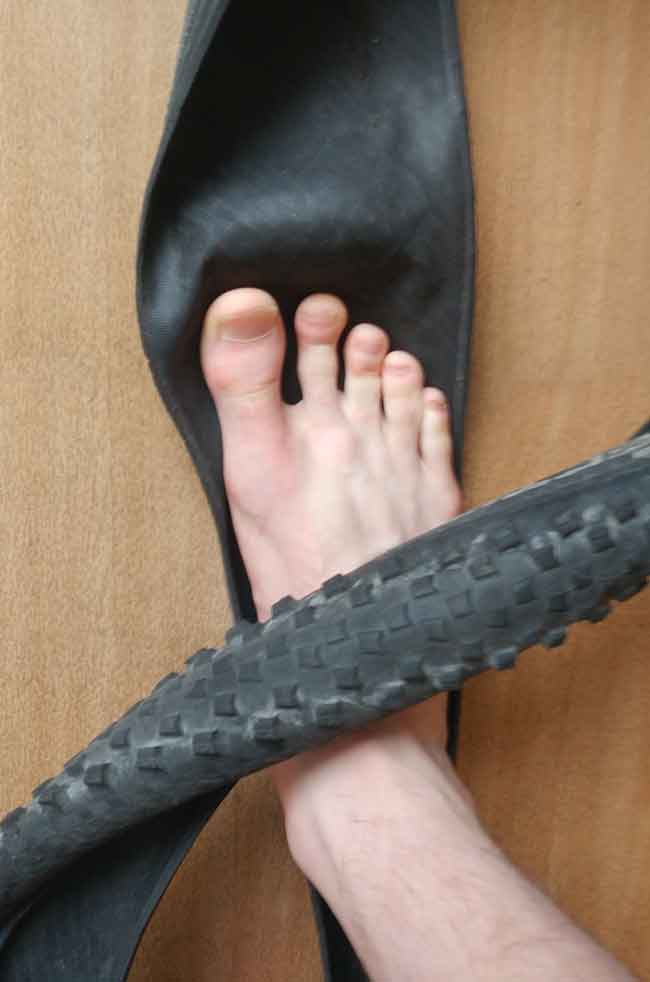

Truly, you can use anything. An old car tire, bicycle tire, or plastic, rubber, foam, or leather.
I went with leather because, well, it’s basically just thick skin. That’s what we want, no?
I went to a local leather/hides trader and asked away. He did say that buffalo leather is superior, but the cow leather was far more affordable and still really good. I bought a 2×1.5m cut so I could make multiple pairs (7) and some laces. The cut of hide was ~$60 CAD.
Tracing your foot
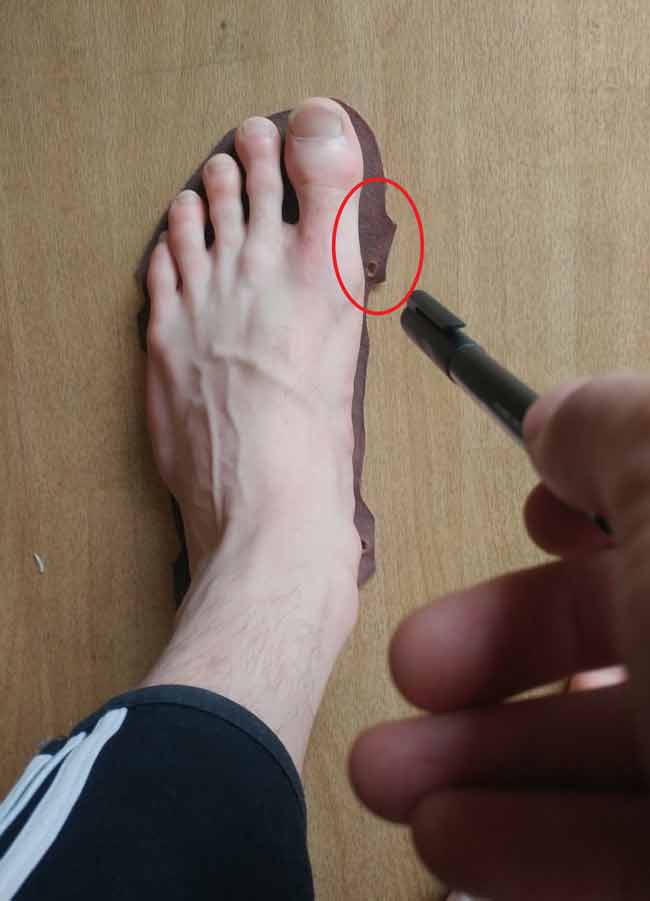

Step 1: Super easy, just trace your foot. Use a pencil and give yourself a bit of space on the outside of the shape. You can always cut more but you can’t put cuts back on! Making it too small at first would suck – remember, you need space for lacing!
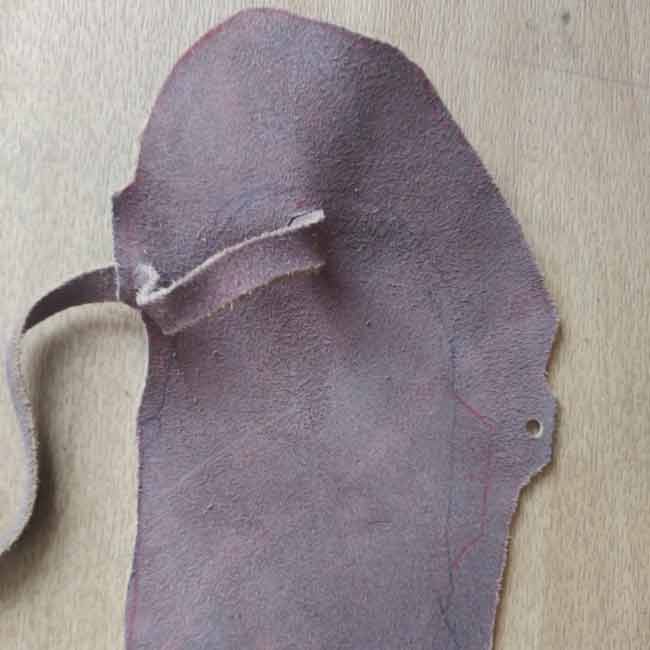
Make marks for lace holes between your big and small toe, in front of your ankle bone (interior), and behind on the exterior. Visualize how you want the laces to interact with your foot. Of course you can do this after cutting the shape, but you’ll need extra room for the laces when making the sandal so it’s better to do this before cutting the sandal.
Cutting the shape
Now that the extreme task of tracing your foot is done, simply just cut it out. Use strong shears/scissors so you can a nice and clean cut. Leather is pretty tough stuff, so maybe hit up the hardware store because regular kitchen scissors may not do the trick.
Cut outside the lines. Again, you can always trim it down afterwards.
Making holes for the laces
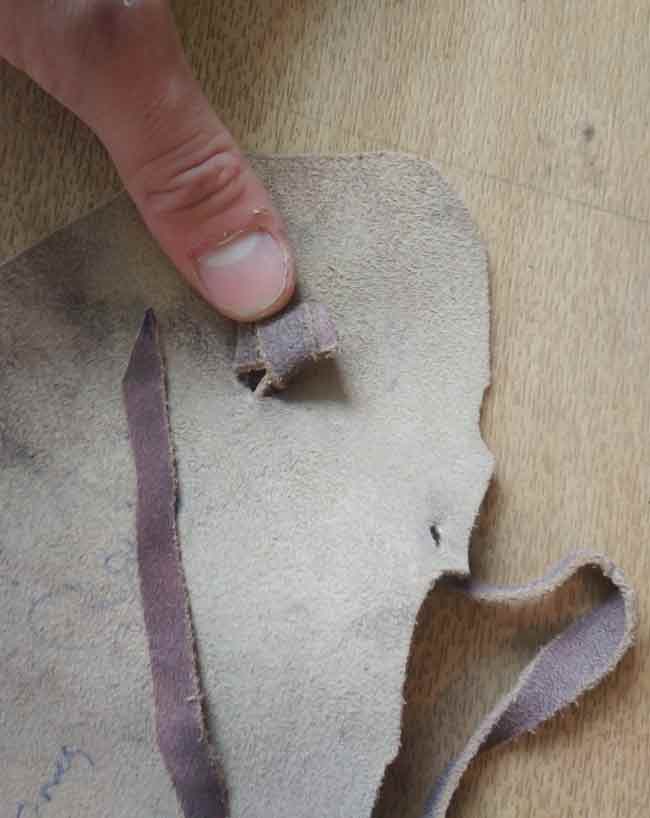

Using a leather punch is certainly superior. You’ll make a clean, non-fraying, non-abrasive hole which is much less likely to widen or tear.
Still, you can use a pick, make a hole, cut out a small hole with a razor/box cutter, and then singe it with a lighter/torch. Be very careful to smooth out or make a clean hole because you don’t want to abrade the laces or allow the grain to tear. Cheap leather punches can be found for ~$10 at hardware stores.
Punch the hole right where the guide marks you made are. You can always make it bigger later, so don’t worry if you punched small holes at first.
DIY barefoot sandal laces
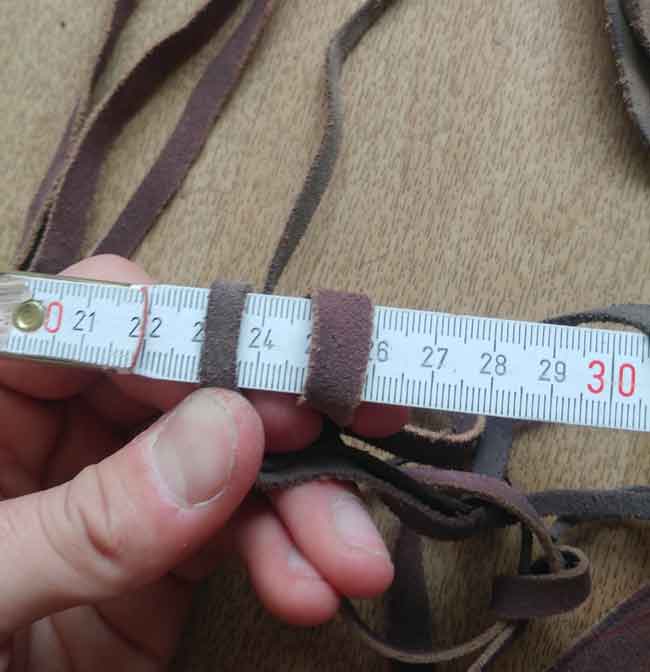

Okay you have two options – make your own laces, or buy some. You can also use paracord or something else, but from my experience, leather is the most comfortable, least abrasive, flexible, and attractive material to use. Beware of cheap eBay ‘fashion‘ laces – they’ll snap quickly.
Buying the laces:
- Go to a leather store or order online. Find the right diameter and choose a very tough and durable leather. Wider is also more comfortable (apply pressure with dental floss versus a strap to your arm). I like ~0.7mm wide laces. My laces are ~1.5m long, each.
Making the laces:
If you have will of steel, you can make the laces. I made 8 pairs of laces and it’s not really that hard. Having a friend helps. You’ll need:
- Long ruler
- Box cutter
- (optional) calipers
- Pen/pencil
- A joint
- Carefully trace a long strip, equal in width on each end and in the middle. Use the ruler to guide
- Very carefully score a shallow line with the box cutter, using the ruler to guide.
- Remove ruler, deep cut all the way through. Go slow!
I recommend making extra laces so if you do accidentally break one through wear and tear, you’ll have a fresh one to slide in. I’ve never broken a lace so far, but you never know!
Lacing the barefoot sandals.
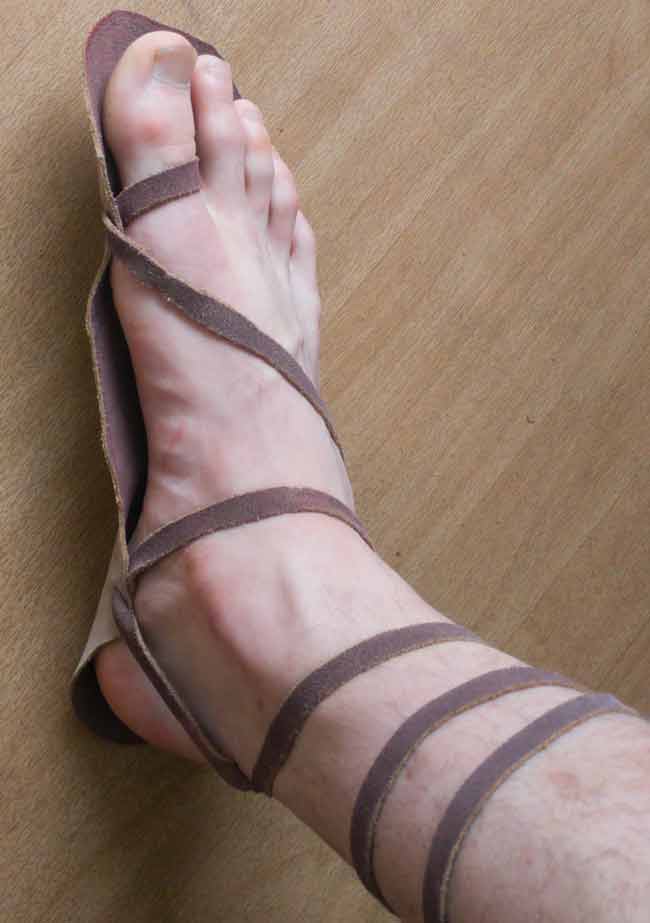
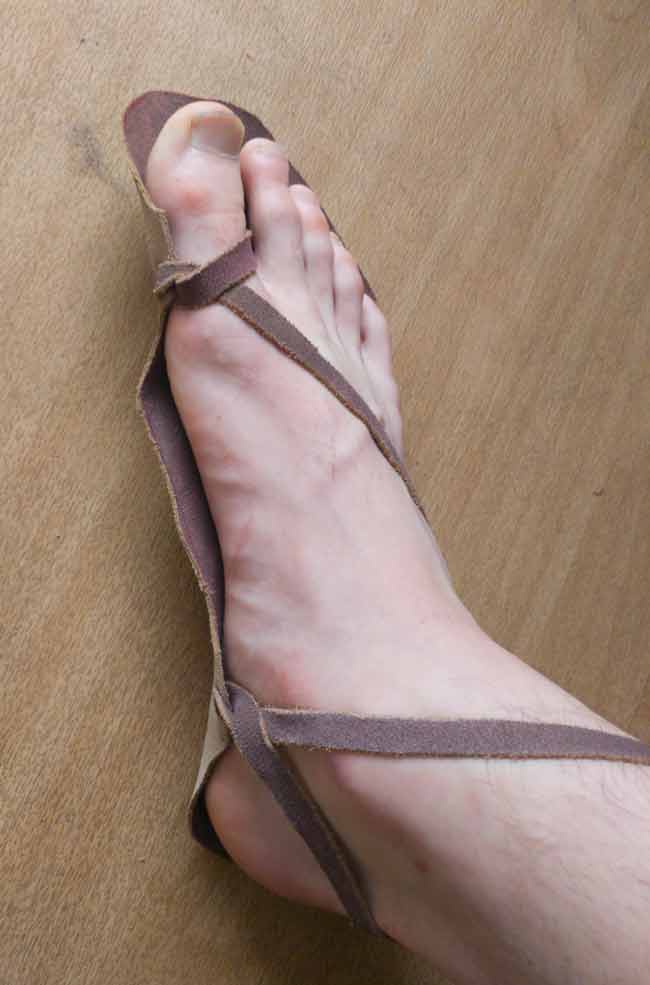
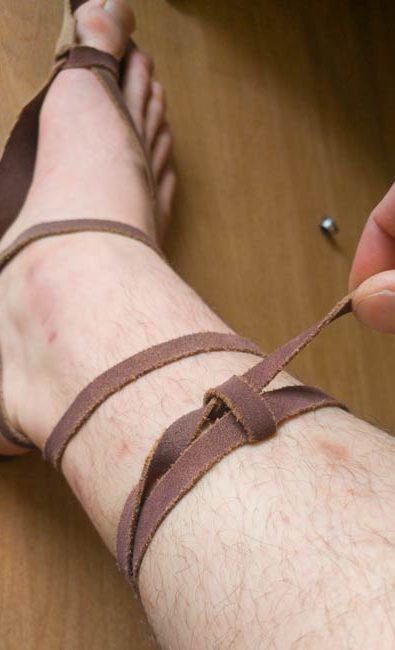
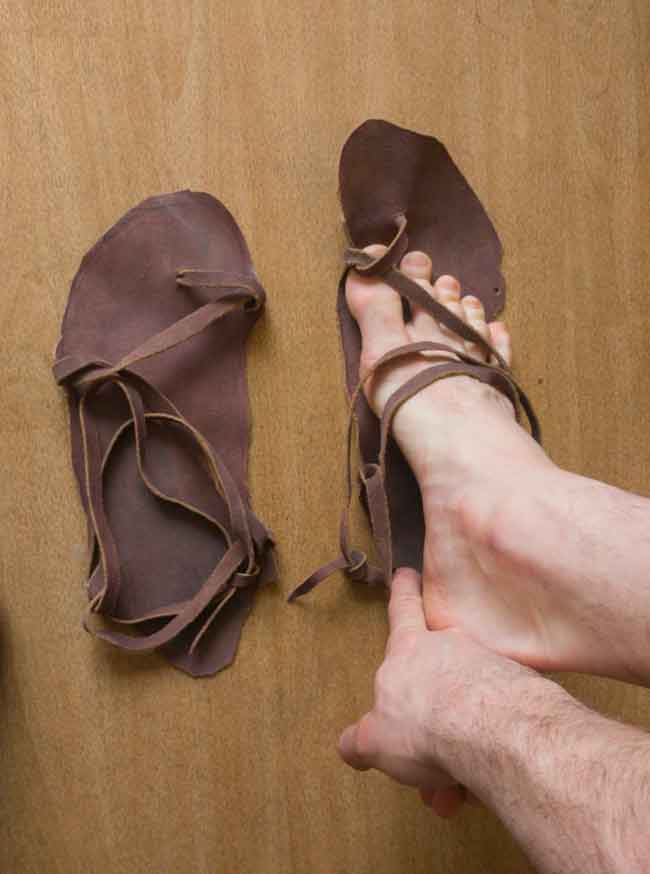
The actual most difficult part and which will require lots of adjustment, lacing your new DIY sandals may take a couple efforts and walks to find out what works best for you. What feels good when walking might be horrid and slipping all over the place when running – but you’ll get it eventually. Here’s how I lace it the Tarahumara way, which, from experience is the most effective and comfy way.
- Lace between toe hole first. Tie off underneath the sandal with a simple knot.
- Across the big toe
- Across the exterior ankle bone
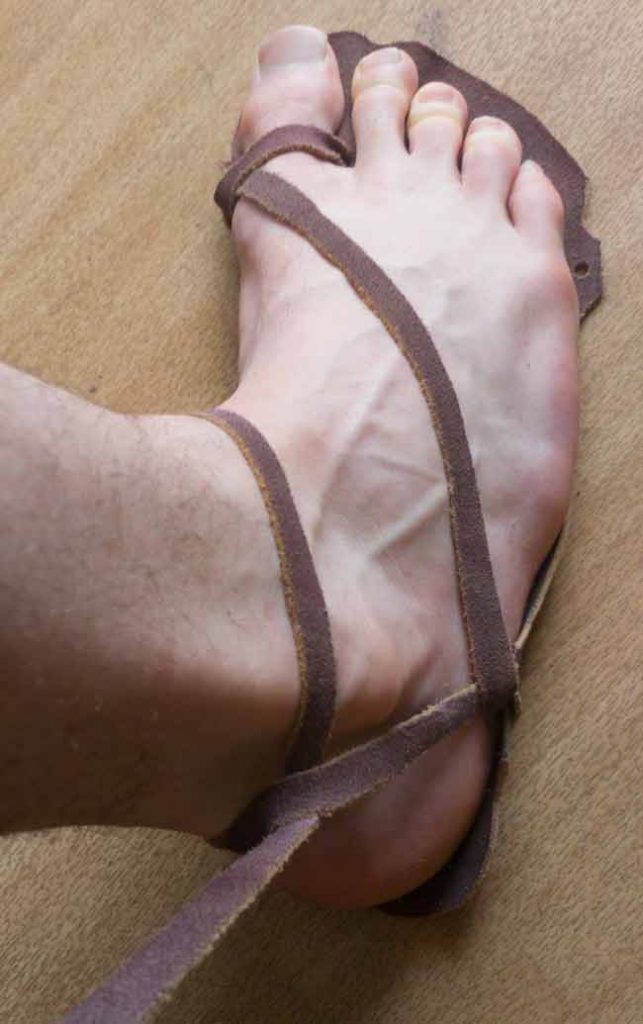
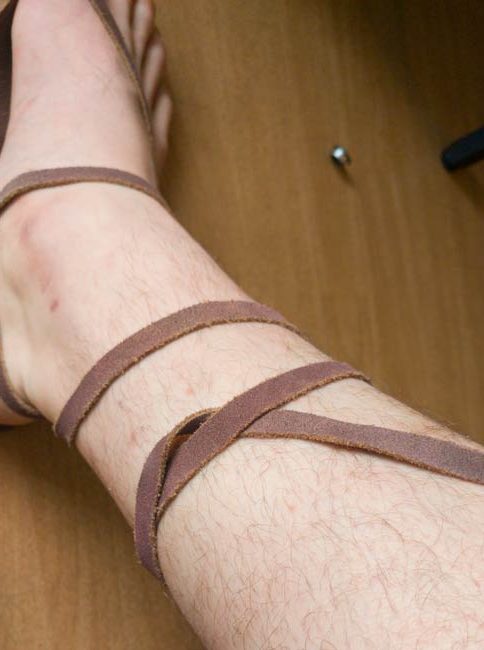
- Across to interior ankle bone, but don’t forget to pass in front the exterior lace (pictured)
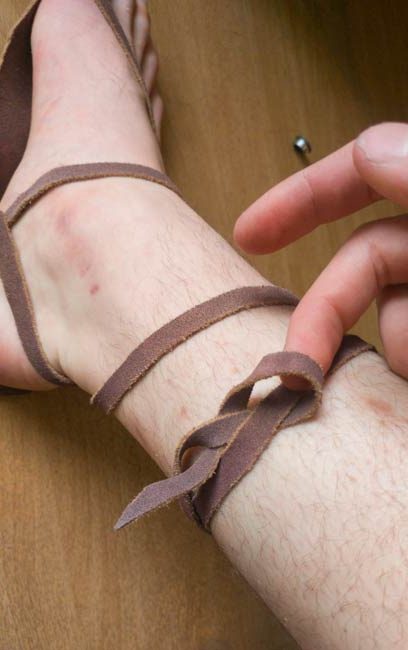
- Cross behind interior lace then in front of ankle. Pass underneath the lace running behind your ankle.
- Finish wrap around ankle, tie off with sliding knot.
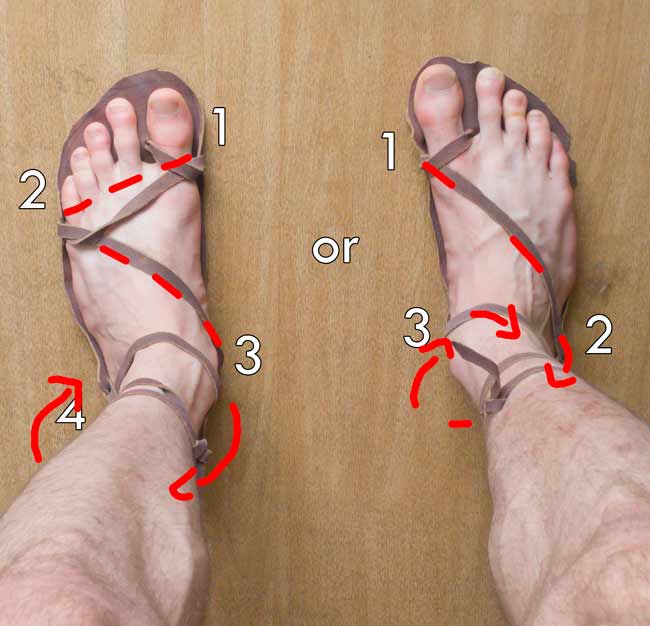

The pictures evidently do a much better job than I can explain. Once you get it though it’s fairly simple. You can tie either of two ways. The method on the left offers outside protection and is nice when walking, but I found it to move the sandal a little much when running. YMMV.








Dyeing and finishing your DIY barefoot sandals
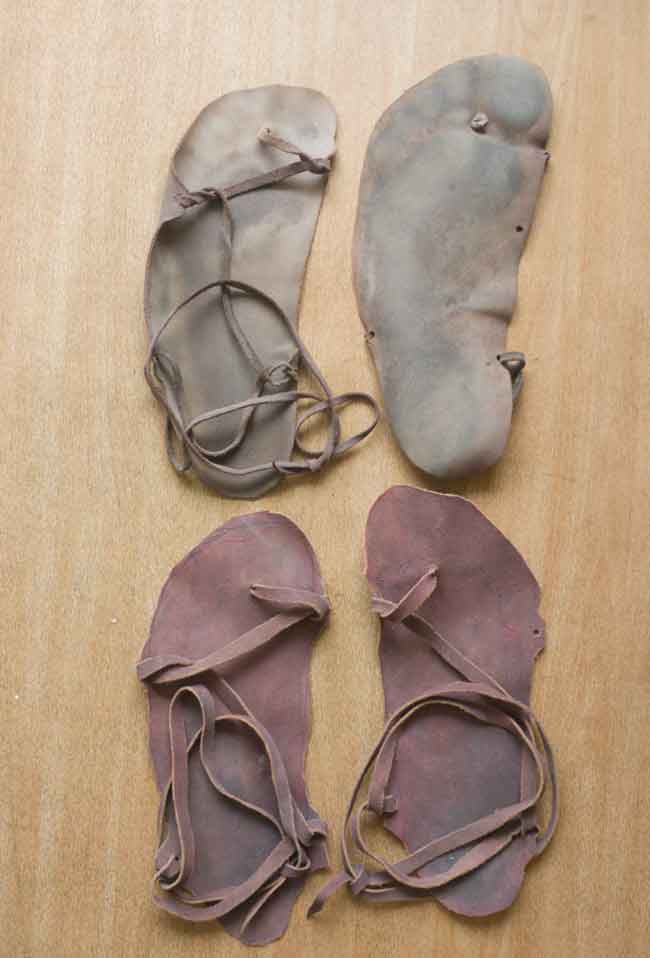
Of course this is completely optional. In my case the dye mostly ran out after a while, but did tint the leather into a darker color. I didn’t like the light tan of the original leather so I went for a dark burgundy. You can seal it with clear coat afterwards, but this may impact the feeling or slipperiness.

Summary
Honestly, it’s less than an hour of work in total. Completely worth it and I made something like 8 sets of sandals for ~$60. Go to your local leather specialist if you have one and ask away. I’m lucky enough to have been in a place which has a strong ‘cowboy’ scene so I was able to get advice from someone legit and pick up some awesome leather.
However, a simple kit from Xero shoes or a pair of their sandals will save a lot of hassle – I’d definitely recommend them for beginners!
While I still use regular barefoot shoes for climbing things like Devils Head, I’ve used them on scrambles and hikes with no problem. Once your feet get conditioned to the earth and rock, you’ll be fine!
Check out my barefoot exercises to help you adjust to barefoot walking and running!

Tips for DIY barefoot sandals
- Measure twice cut once! Be slow and methodical with your process.
- Make extra laces and measure them out from your main chunk of leather first
- It’ll take a few days to get your laces fitted perfectly, don’t worry if it feels weird at first!
- Don’t trim extra material until you’ve tested the sandals for a while! You might regret it at first
- Enjoy the feeling of the earth with your amazing barrier of protection!
Consider donating a coffee-amount of coins via PayPal at bottom of this site if my article helped you 🙂
Related posts

I spent 7 years on the army, infantry, rucking with heavy weight on my back for a living. My arches were collapsed through all of that, my feet hurt often, and I wanted a way out. I learned about barefoot shoes and now everything I wear is barefoot with zero drop and zero arch support. I’m not typically into hippie woowoo stuff, but barefoot shoes have really taught me its better to rebuild the body than use crutches (like drop soles and insoles) My arches no longer hurt, my feet never hurt, I’m not sure if the arches are “restored”, I have no real inclination to try and measure it out, I dont care, my feet are in better shape than they’ve ever been if I go by discomfort and foot strength/flexibility. I do hike regularly still. I can’t *guarantee* your experience will be the same of course, but my anecdotal evidence says switch to barefoot, rebuild your own body, and never look back. it might take a bit of time to adjust, its not a quick fix solution, but it is a long term solution.
I wish you the best
Hello
i am not sure if i use the right term or not but let me try
is this untreated leather? iam trying to buy online but not sure what keyword i should use to buy the “right” leather
which side do you use for road surface?
thank you
it’s treated leather, and doesn’t matter which side road surface tbh
have you adjusted any hole placements since you took these pictures (do you still think they are in the best positions)? Do you do anything for the leather? Rotate usage, avoid dewy grass? I have no experience with leather but found a large piece for very cheap, though it is dry enough to crack.
Also curious if you use any sort of slip on style, like to take out the trash and not worry about dirtying the feet.
Couldn’t you get a leather purse at the thrift store for a couple $$?
People give away leather furniture too. Love the tutorial.
That’s a decent idea, but the leather definitely has to be thick and strong enough.
Many household items or purses may use just a very thin and weak type of leather since they’re not made for that purpose, but if it’s thick and strong leather it certainly could work!
I genuinely hate shoes! But the one benefit of conventional shoes is longevity. you can buy a good pair of boots for the price of a pair of vivo barefoot hiking shoes and they will last 10-15 years. That’s the biggest drawback of the barefoot experience. So I think the barefoot companies should drop the whole eco sustainable claims. These sandals in the other hand are genuinely eco friendly, when they wear thin you can throw them in the garden and they will biodegrade. I made mine using thicker bull hide leather. I get 4 years of wear and I can hike any rough terrain in them. I only pull the heavy hiking boots out when I’m carrying a really heavy backpack across rough terrain. otherwise I set my Jesus sandals. thanks for the instructional, I will try this lacing method, I’ve always wanted to look like a gladiator
Hey I was just wondering, because this happened with a pair of flip flops I had. Does the front part of the shoe(under your small toes) like flip or gold under? Because thes no strap holding it in place. The leather isn’t stiff, so I just wanted to know if that’s ever happened before?
Surprisingly not – it was certainly something I was thinking would happen but nope! I guess with the front toe being tied it never went under 🙂
Thought you’d like to see the “walking baby” version we made using your instructions. We had to make an adjustment in tying the lace around the heel. Probably could improve the entire lacing process for tiny baby feet, but couldn’t have done this without your guide! My YT LINK: https://youtu.be/is_XMICcySw
I want to run in barefoot shoes, as I’ve heard about the benefits, but I’m not sure if I need to take any extra steps to protect my arches. I’m extremely flat-footed, and I pronate as well. I enjoy running/racing mid to long distances(anywhere from 1mi to 13), but I’ve had some bad experiences with zero drop shoes in the past. I got stress fractures in both legs and wasn’t able to run for an entire summer. Please tell me your thoughts.
P.S. I don’t know if you’ve ever read “Born to Run”, but it seems like a book you may like.
I spent 7 years on the army, infantry, rucking with heavy weight on my back for a living. My arches were collapsed through all of that, my feet hurt often, and I wanted a way out. I learned about barefoot shoes and now everything I wear is barefoot with zero drop and zero arch support. I’m not typically into hippie woowoo stuff, but barefoot shoes have really taught me its better to rebuild the body than use crutches (like drop soles and insoles) My arches no longer hurt, my feet never hurt, I’m not sure if the arches are “restored”, I have no real inclination to try and measure it out, I dont care, my feet are in better shape than they’ve ever been if I go by discomfort and foot strength/flexibility. I do hike regularly still. I can’t *guarantee* your experience will be the same of course, but my anecdotal evidence says switch to barefoot, rebuild your own body, and never look back. it might take a bit of time to adjust, its not a quick fix solution, but it is a long term solution.
I wish you the best
Oh! another thing, when it comes to running with barefoot shoes, you do have to adjust the way you run to avoid stress fractures I believe. You’re probably used to heel striking, since you learned to run with an inch of foam under your heel. Try running landing on the balls of your feet, using your calves as something of a spring. When running with barefoot shoes, if I heel strike I know thats a whole lot of shock on the bones, but using a ball strike there’s significantly, almost zero, shock. it does mean relearning how to run, but I believe that might be the solution to your stress fracture problem!
Hello, thank you very much for putting this up. I was wanting to make something similar and did a search and that is how I found this. I also have warn Vivobarefoot shoes for close to 10 years now and wanted something even more natural. I wish you the all the best. I would really like to see what else you may have created. Thank you again!
Glad to help! Thanks for the nice comments 🙂
Walk barefoot or with
under 5mm soles for 10000 steps a day for 6-9 month before you start to run. Then you should be safe!
Such a great idea, thanks for sharing.
One of the best tutorials!
I’ll make a joint and a pair 😍🙏