- Review: HOTT Sauna – The most portable sauna tent? - February 5, 2026
- Review: Telttasaana Sauna Tent – Narvi stove is the MVP! - February 4, 2026
- The Best Sauna Tents – A Complete Guide (2026) - January 22, 2026
After making numerous holes, rips, and tears in my Arc’Teryx gear, I’ve figured out some simple and cheap repairs that’ll help you get your gear back into action.
I’ll go over a few different things including how to fix a ripped Atom LT, an Arc’Teryx zipper repair, pulled fibres, how to fix Arc’Teryx waterproofing, and other product failures. Lets get started!
Table of Contents
Arc’Teryx jacket zipper repair
The zipper on my trusty Atom LT failed! This is not uncommon and zippers are usually the first point of failure. Mine simply broke apart while biking one day but now it’s back to new!
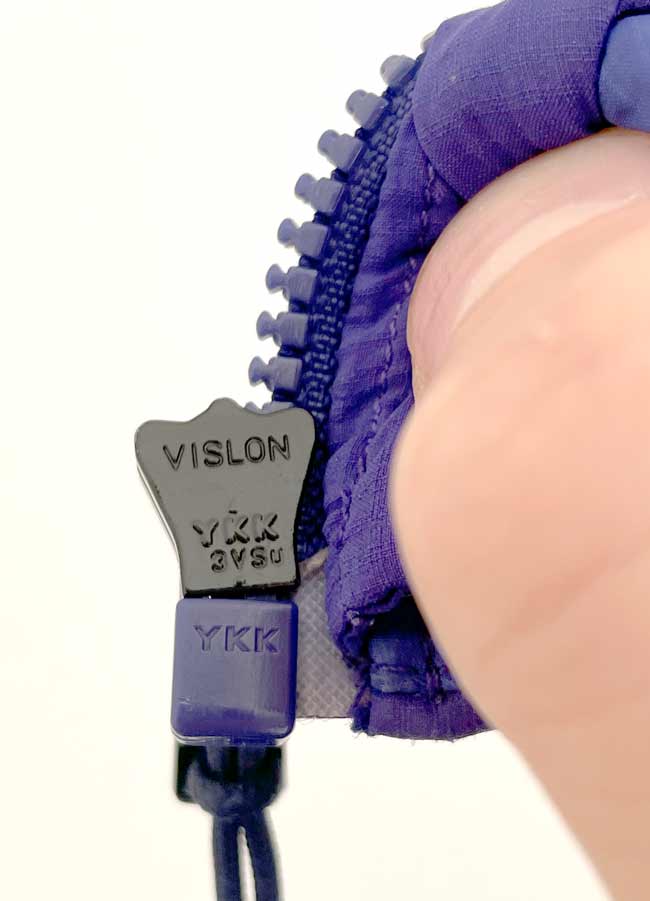

You’re not going to like this, but it’s hard to find an Arc’teryx zipper replacement. I would not recommend buying an Arc’teryx zipper replacement online because even the same model may have zipper changes from one year to another (as per what the Arc’Teryx repair specialist told me in store). It’s best to test in-person and see what works.
However, the YKK VISLON 3VS zipper is what Arc’Teryx used to replace the zipper on my 2020 Arc’Teryx Atom LT squid ink. I can’t guarantee it’ll fix other models or years but that’s what’s on mine.
You have 3 options to fix your Arc’Teryx zipper:
1 – Fix your Arc’Teryx zipper at an official store
Arc’Teryx physical locations will repair your Arc’Teryx gear for free! I’ve done this and brought in my heavily abused Atom LT. I lost the original zipper even but they searched their inventory and found (and fixed) the zipper at no cost and it only took about 10 minutes! They also gave me patches and patched my Atom LT, but it turned out kinda hideous.


If you don’t have an Arc’Teryx store near you it might get a little more tricky as the zippers are fairly unique (as they told me).
Alternatively, you could use gear repair patches and then add a custom patch for additional style and customisation! I got some Heat Transfer Patches which are easy iron-on patches, from Patches.co. This helped personalise the look of my repaired gear and give even more flavour to a DIY repair! Definitely a good idea to bring back to life some old ‘Teryx!
2 – Bring it to a seamstress
Yes they still exist. For now at least…
Anyways, bring it in! Maybe they have a matching zipper which can be installed in a few minutes for cheap! If that’s not the case, you’re going to need the whole zipper assembly including teeth to be swapped out. For a skilled seamstress this might not take too long but of course is more expensive and won’t be original anymore and will void your warranty.
Worth a shot though!
3 – Send it into Arc’Teryx for repair
Depending on what you’re trying to send in and how badly it’s broken (and how it happened in the first place), Arc’Teryx might just be able to repair it for free!


Their product service page will answer any questions you have.
Yes, you will have to pay shipping when sending to them and they will cover return shipping. A lot of people have had a good time using this repair service so I recommend it if option 1 and 2 aren’t viable. They might even send you a brand new replacement piece!
Arc’Teryx jacket tear repair
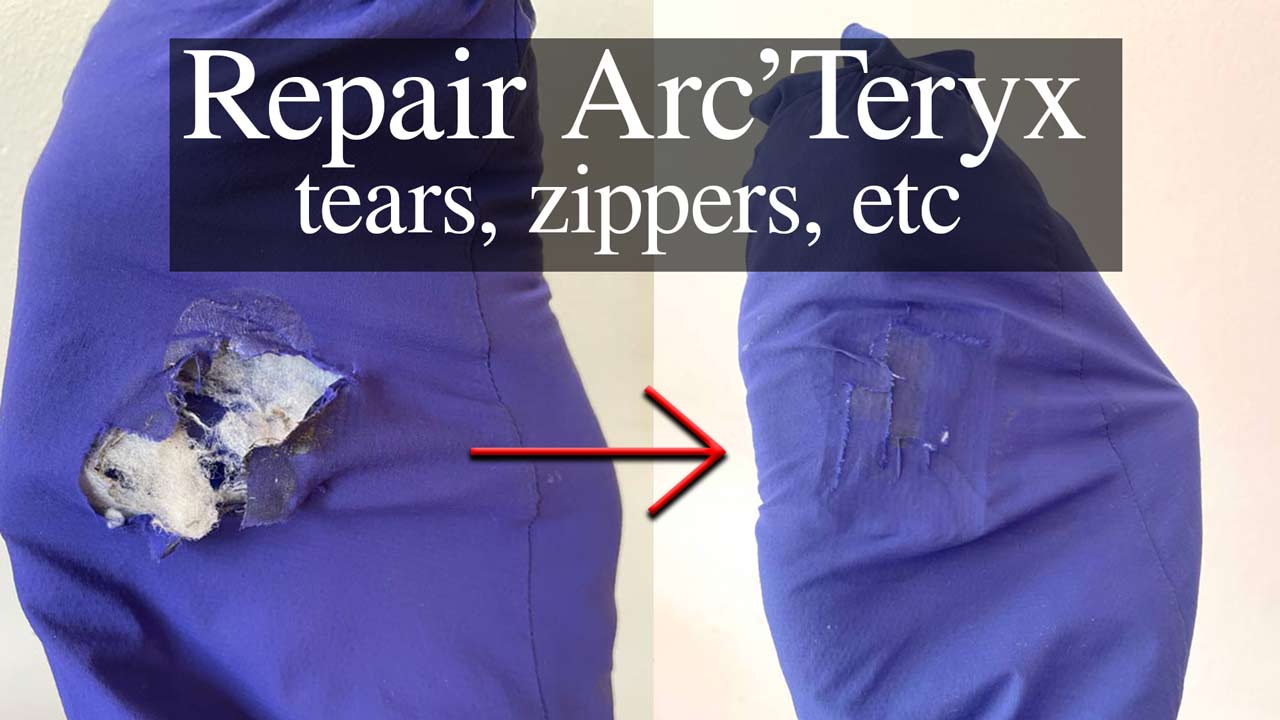
Okay so I’ve make about 6 holes and rips in my Atom LT jacket. Here’s how I fixed them.
Though the magic of… duct tape..
Yep. It works great, really! It won’t be invisible and eventually will wear out and need repair again, however I’ve had nothing but success in mending ripped Arc’Teryx gear with tape.


DIY Arc’teryx repair guide (torn jacket)
Total Time: 30 minutes
Expose & clean tear
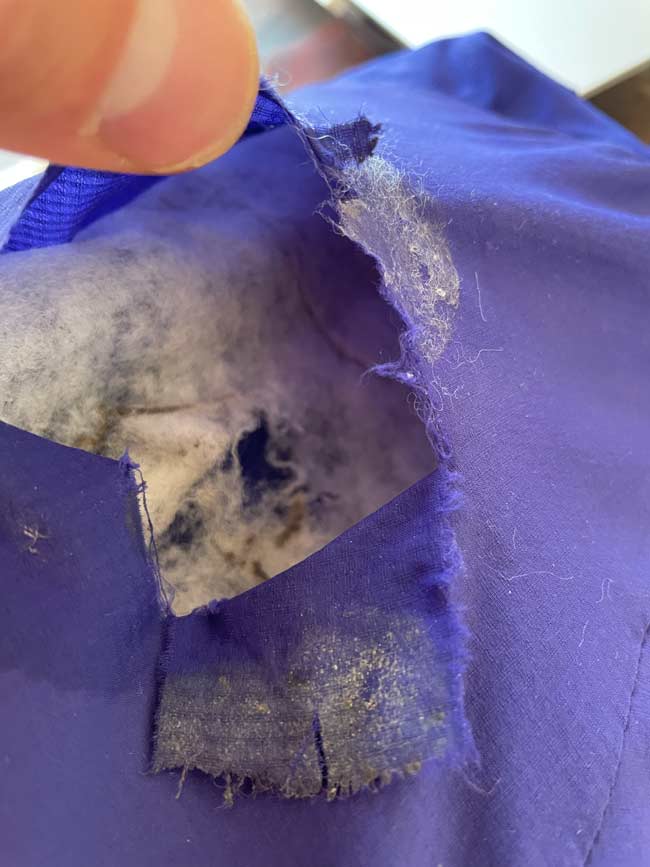

Simply clean the tear with soapy water or isopropyl alcohol to remove dirts, oils, and other grime. As you can tell, some of the insulation is ripped as well, so we will use some tape to keep that in tact and prevent air leakages.
Prepare the tape


I like to use extra strong duct tape. Cut it slightly longer and wider than the tear you’re trying to patch. We will apply one facing downwards and one facing upwards to keep the insulative properties in tact.
Place your new patch
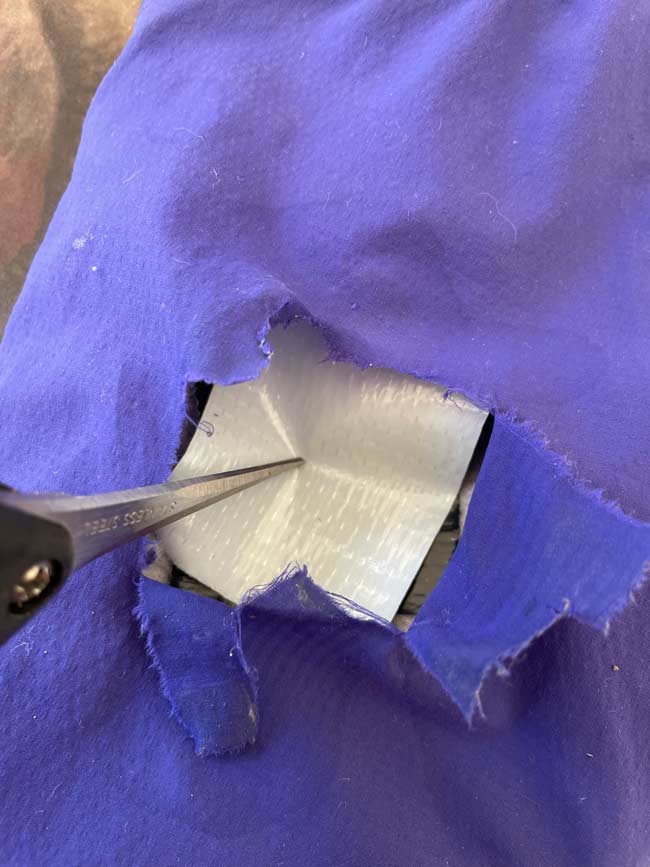

Place it on the inside of the material, sticky tape facing outwards. This helps to make the repair become visually cleaner and last longer than placing it on the outside.
Align and close the tear
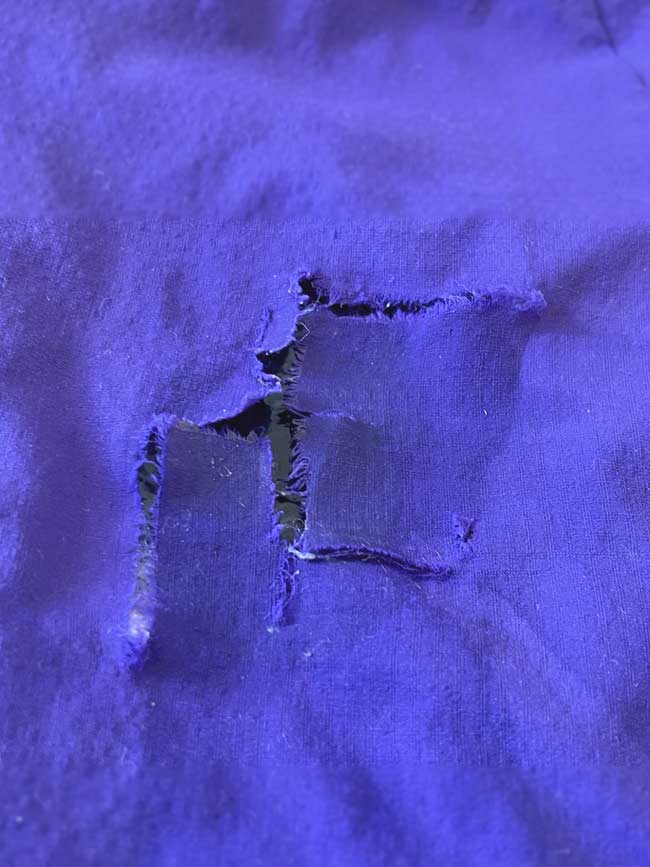

Apply pressure and rub for some time so the adhesive binds to the material.
Finished!


Far from perfect but a massive improvement over the regular patches or simply a broken jacket!
- 1 – Expose tear
- 2 – Use isopropyl alcohol to clean inside and outside of tear (to remove finger oils)
- 2 – Cut a piece of tape a bit longer than the tear
- 3 – Place on inside of tear, sticky facing outwards
- 4- Carefully align and close the tear
- 5- Apply pressure and rub the repair to fully adhere material to the tape.
This works well on softshell fabrics like those on the Gamma or Atom lineups. For Gore-Tex hardshells this will also work, though the tape will likely not adhere as well.
I have used the official Arc’Teryx repair patches which they gave to me at the Arc’Teryx store, but I actually wound up preferring the tape as it was more discreet, flexible, and easy to apply.
Arc’teryx Gore-Tex repair


Instead, to repair damaged Gore-Tex I recommend using a nylon or Gore-Tex patch kit. Some of these are self-adhesive and others have a type of rubber cement which you apply.
Bonus: these patch kits are excellent for fixing a damaged tent, tarp, backpack, or other. Simply follow the instructions and you’ll have your Arc’teryx jacket repaired in no time!
Pulled fibres on clothing
If you have a pesky cat who loves pawing and clawing and pulling the little fibres on your Gamma SL pants (thanks, cat…) you can try the classic pinch and roll technique.
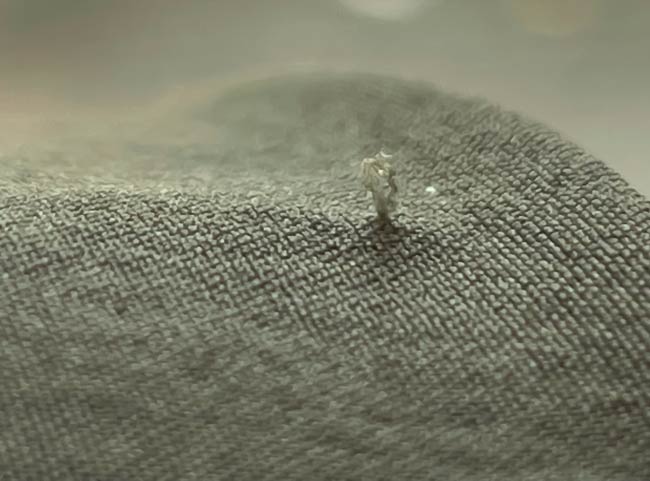

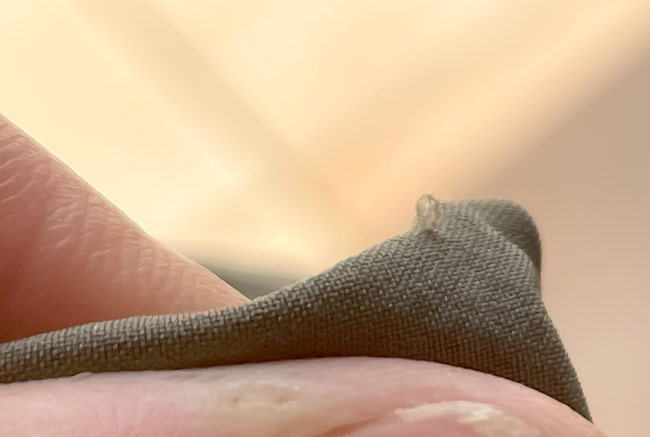

Guys are all too familiar with this and it work for fixing some of your Arc’Teryx clothes too! If the fibre is simply pulled up but not broken, all you need to do is ‘massage’ the fibre so it returns back to its original position.
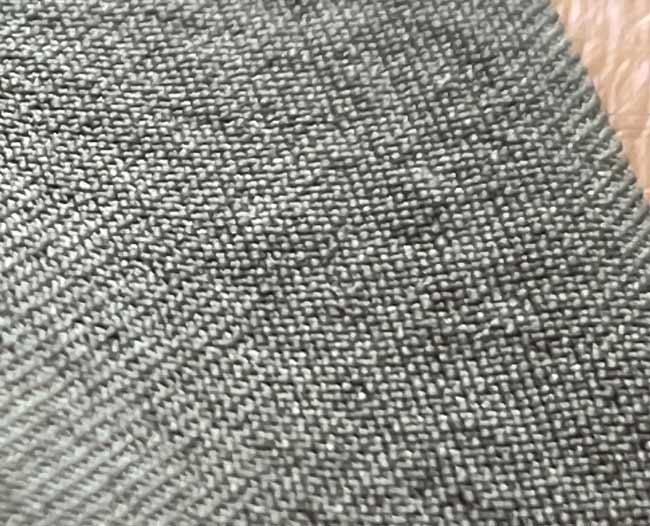

Do this by stretching, pinching, and rolling the area with the raised fibres until it goes back into place! This has worked extremely well and has saved my nearly brand new Gamma SL pants from the curse of cat claws.
Arc’Teryx waterproofing – making it work again
Over time, Gore-Tex and other waterproof shell materials will lose their ability to bead. This is normal and simply requires re-conditioning with some DWR spray or wash-in detergent.
A lot of people swear by the Nikwax products – either the spray or wash-in laundry additive. I’d go with the spray because they usually work better.
Repair torn Arc’teryx fabric
If you have a regular base layer like the RHO Hybrid or a nice merino wool shirt and the duct tape fix doesn’t seem like the move, simply just stitch it back together with a good ol’ fashioned needle and thread! The better and more practiced you are with a needle and thread the more ready you are for the future!
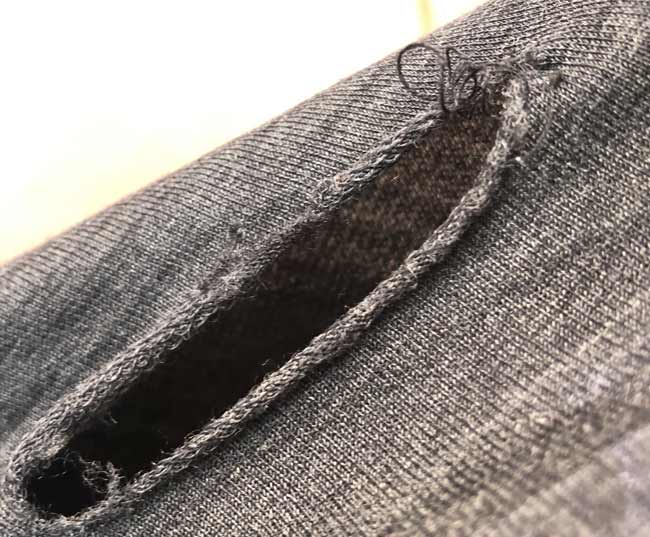

Always stitch holes sooner rather than later so they don’t have a chance to grow!
Summary
I hope this guide to fixing your Arc’teryx gear helped! I’ve fixed and mended a dozen holes, tears, gashes, etc. Their clothing is tough but it’s inevitable that you’ll break it down if you subject it to much abuse.


Any questions or things you’d like to add please leave a comment below or on any of my socials – I’m always glad to help out!



Do you have any contact information for Arc’teryx? I have a zipper that needs replacement on a jacket that is otherwise in mint condition. I want it done right. TY,Ray
no sorry – better bring it into an official arc’teryx shop directly or use their contact on their website